Pages

Friday, December 16, 2011

Customize Your Ubuntu 11.10

I love customizing Ubuntu, and after upgraded my OS to Oneiric Ocelot, I realized that I've customized so many things. Here is the screenshot of my desktop.

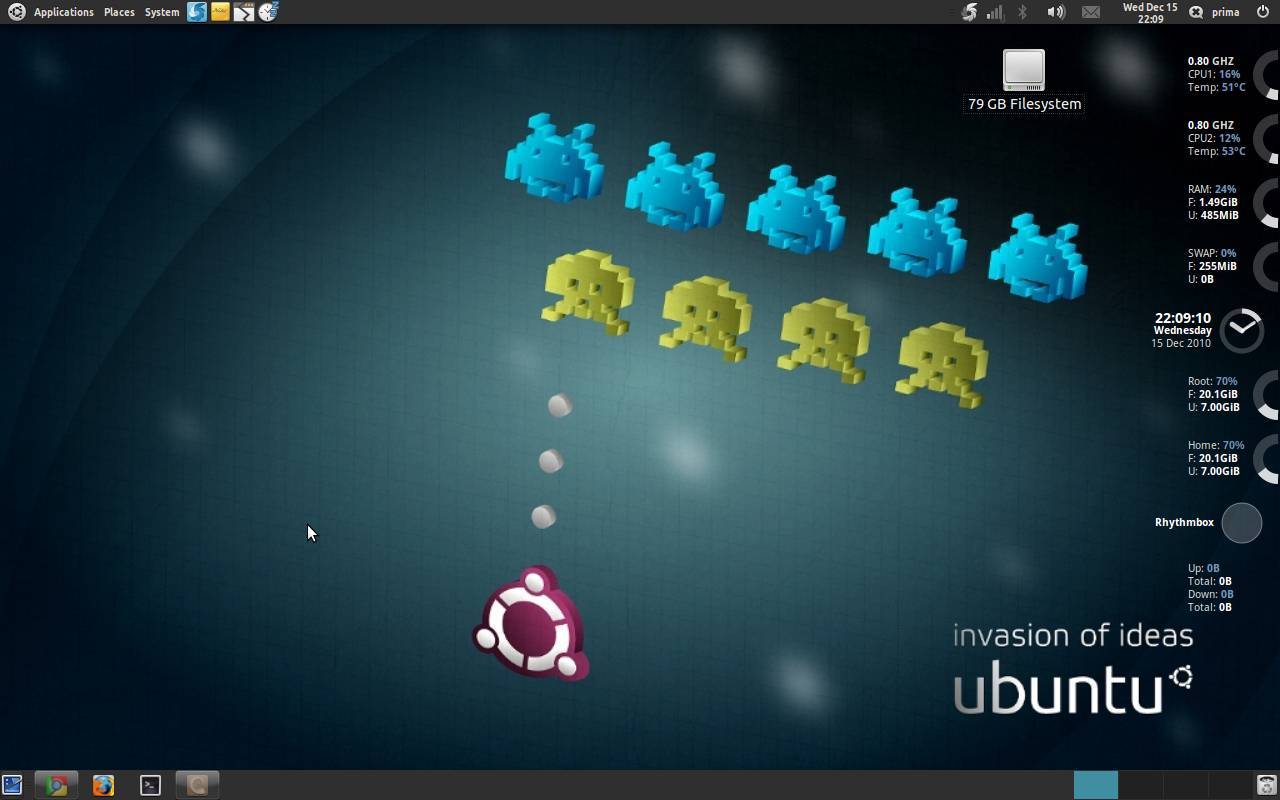
Customized Ubuntu 11.10 with Gnome Shell

List of some useful Gnome Shell extensions that I've tried:
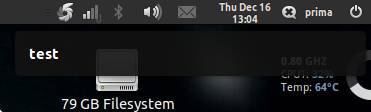
List of some Gnome Shell theme:
The other things to do?


Or find it here : http://www.webupd8.org/2011/10/things-to-tweak-after-installing-ubuntu.html

Note: I'll update this page later (if I've tried and installed the other extension.)
Happy Customizing :)

Saturday, December 10, 2011

Get back Share button in new Google Reader

I'm a Google Reader user, and we know that Google has introduced their new interfaces. Ok, it's cool and clean but I lost something useful in Google Reader. I can't find the original Google Reader share button. Maybe it is replaced with Google + share button? Oh I missed that button, because the shared item linked with my personal blog.

Ok, fine. I tried to ask Google itself and found that there is an extension to get back Google Reader original share button. Yay! And here is the link for the chrome extension. Thanks to these extension :) And here is the result :)


Download for Google Chrome extension: https://chrome.google.com/webstore/detail/gmgmcmhmodidojodfoekpbjnejlhcbpb?hl=en-US

Tuesday, December 6, 2011

The Evolution of the Geek [infographic]

from dailyinfographic.com (http://dailyinfographic.com/geek-streak-infographic)

Highlight Syntax in Blogger

Last time, I've tried to customize my Blogger template so when I posted some code, it can display code more clear. Asked Google and found that it was so easy to highlight code in Blogger using Syntax Highlighter.

All you need to do is:
1. Go to your Blogger setting where you can edit your Blogger template.
2. Use your browser to find </head> tag.

Saturday, December 3, 2011

Add Blogumus to Blogger

Blogumus is a flash based tag cloud which display all of your blog label in a nice flash animation. It is very simple to add it into your Blogger. If you're using the new Blogger template (not Dynamic template), then open your Blogger template and proceed to Edit HTML.

There, check the 'Expand Widget template' checkbox and search for something like this one:
<b:section-contents id="sidebar-right-1">
.
.
.
</b:section-contents>

If you've found it, there you'll found all of your sidebar widget. Just add this code so it'll become like this one:
<b:section-contents id="sidebar-right-1">
.
.
.
<b:widget id='Label99' locked='false' title='tag cloud' type='Label'>
  <b:includable id='main'>
    <b:if cond='data:title'>
      <h2><data:title/></h2>
    </b:if>
    <div class='widget-content'>
      <script src='http://sites.google.com/site/bloggerustemplatus/code/swfobject.js' type='text/javascript'/>
      <div id='flashcontent'>Blogumulus by <a href='http://www.roytanck.com/'>Roy Tanck</a> and <a href='http://www.bloggerbuster.com'>Amanda Fazani</a></div>
        <script type='text/javascript'>
        var so = new SWFObject(&quot;http://sites.google.com/site/bloggerustemplatus/code/tagcloud.swf&quot;, &quot;tagcloud&quot;, &quot;240&quot;, &quot;300&quot;, &quot;7&quot;, &quot;#ffffff&quot;);
        // uncomment next line to enable transparency
        so.addParam(&quot;wmode&quot;, &quot;transparent&quot;);
        so.addVariable(&quot;tcolor&quot;, &quot;0x333333&quot;);
        so.addVariable(&quot;mode&quot;, &quot;tags&quot;);
        so.addVariable(&quot;distr&quot;, &quot;true&quot;);
        so.addVariable(&quot;tspeed&quot;, &quot;100&quot;);
        so.addVariable(&quot;tagcloud&quot;, &quot;<tags><b:loop values='data:labels' var='label'><a expr:href='data:label.url' style='12'><data:label.name/></a></b:loop></tags>&quot;);
        so.addParam(&quot;allowScriptAccess&quot;, &quot;always&quot;);
        so.write(&quot;flashcontent&quot;);
      </script>
    <b:include name='quickedit'/>
    </div>
  </b:includable>
</b:widget>
</b:section-contents>
Done? Preview it and if everything is ok, you should see flash based tag cloud on your sidebar!

If your blogger using the old template, or if you want to customize your blogumus, then you can follow instruction here:
http://www.bloggerbuster.com/2008/08/blogumus-flash-animated-label-cloud-for.html

Happy customizing! :)

Sunday, July 10, 2011

Connect to database with XML HTTP Connection (POST)

Ok, last time I've show you how to use XML HTTP Connection with GET method. Now I'll show you the other method, using POST method. Ok, first, using the same HTML file, but we need to edit the Javascript.. Here is the HTML file for post method
<div id="test2" onClick="getIt('test2')">
2
</div>
<div id="test1" onClick="getIt('test1')">
1
</div>
Using the same database like before, and the same PHP file, but we need to change some code on it. This is for the PHP file.
<?php
$username="mysqlusername";
$password="mysqlpassword";
$database="xml";
$field1=$_POST['field1'];

$con= mysql_connect("localhost","root","");
mysql_select_db($database) or die("unable to select the database..");
if($con)
{
echo "Result of".$field1." \n";
$query="select * from dummydata where id=$field1";
$res=mysql_query($query);
$done=mysql_fetch_array($res);
  if($done['content']!=null)
    {
    echo $done['content'];
    }
  else
    {
    echo "error";
    }
}
else
{
echo "Invalid login information!";
}

mysql_close($con);
?>
Ok, that's all, test it and you'll get the same result like before ;)

Wednesday, July 6, 2011

Connect to database with XML HTTP Connection

This time, I want to share about XMLHttpConnection. I learn this thing because I need it to develop my (first) BlackBerry application. What is the purpose of XMLHttpConnection? With XMLHttpConnection, I can request a connection in background without reloading the page (something like that). Nah, I tried it and it was successful. Now, it's time to share. I'll show you step by step.
note: this XMLHttpConnection example using GET method. For POST method, I'll post it later. 
First, let's create a simple HTML file. This is my HTML file with some JavaScript code:
<script type="text/javascript">
function getIt(xx){
var get= parent.document.getElementById(xx);
if (window.XMLHttpRequest)
 {// code for IE7+, Firefox, Chrome, Opera, Safari
 xmlhttp=new XMLHttpRequest();
 }
else
 {// code for IE6, IE5
 xmlhttp=new ActiveXObject("Microsoft.XMLHTTP");
 }
xmlhttp.open("GET","http://localhost/xmlcon/connect.php?field1="+get.innerHTML,false);
xmlhttp.send();
alert(xmlhttp.responseText);
xmlhttp.close();
}
</script>
<html>
Simple XML HTTP Request
<body style="font-size: 3em">
<div id="test2" onClick="getIt('test2')">2</div>
<div id="test1" onClick="getIt('test1')">1</div>
</body>
</html>
Save as main.html and test it in my localhost and the result is like this:


Monday, June 27, 2011

Create button, Input field and tooltip using BlackBerry WebWorks!

Last time I showed how to say "Hello World" from BlackBerry. Now I want to show you how to create simple alert button, input field and tooltip :). All you need to do is create a simple HTML, configuration file for your WebWorks application (config.xml), a CSS file to customize the interface and add some image for your application icon. Put it in one folder and compile it with bbpw.exe which you can found in the directory where you installed BlackBerry WebWorks SDK.


Thursday, June 23, 2011

Build a simple BlackBerry Application using BlackBerry WebWorks!

This week, I learn how to develop a BlackBerry application using BlackBerry WebWorks. Why using BlackBerry WebWorks?
BlackBerry® WebWorks™ applications are stand-alone web applications that use HTML, CSS and JavaScript®. They look, behave and have the same security mechanisms as a native BlackBerry smartphone application. BlackBerry WebWorks applications can be installed on a BlackBerry smartphone like any native BlackBerry smartphone app and extended to use device-specific information and data with BlackBerry WebWorks APIs.
I'm not an expert Java programmer, so I spent a lot of my time to learn and build BlackBerry application using Java code. Now with BlackBerry WebWorks, I can develop BlackBerry application using HTML, CSS and JavaScript.

Hello World application

Thursday, June 9, 2011

RGB Image Processing using Matlab

This is what I've learned in this semester. In Digital Image Processing class, my lecturer gave me a very strange image. Let me show you the image..

Real Image
Ok, now what to do with this image? My lecturer said that maybe he'll use this image in the final examination. I've heard that last semester, the same lecturer gave this picture too in the final examination. The main goal is to remove the noise from the image, and then manipulate the object in the image so that the rubber band will have a red color and the other solid objects will have a green color, using Matlab. I've trying to do it several hours ago  using Matlab, and the result is.... Yes, I can! Here is my Matlab script to manipulate the image above:

Friday, May 20, 2011

Office Tabs create tabs inside Microsoft Office

Editing a lot of document using Microsoft Office? Tired switching from one document to another document? Yup, if you have so many document opened, I believe your taskbar is so full and you'll be confused. Hmm, don't worry guys! Now you can use Office Tabs to help you managing your document.

So what is Office tabs? This is what they said in their homepage.
Office Tabs is a powerful office add-in to view, edit and manage documents, workbooks or presentations etc via a Tabbed View in Microsoft Office 2003, 2007 and 2010. Microsoft Office has not supported tabbed view by itself yet. Office Tabs solves this issue. With Office Tabs, you can manage multiple documents within a single window easily and quickly.
I've tested this on Office 2010, and let's see this screenshot..

Office with tabs

Monday, May 9, 2011

Easily create .iso file with Brasero

If you want to make an .iso file in your Ubuntu, no need to worry, you can use Brasero Disc Burner. Last time, I tried to make an .iso file with this application. It is very easy. First, open Brasero (default location: Apllication > Sound&Video > Brasero Disc Burner). 

Brasero user interface 

Wednesday, May 4, 2011

Manually install JDK on Ubuntu

Last time, I tried to install Net Beans on my Ubuntu, and of course I need JDK (Java Development Kit) to install it because the installer ask me too. Ok, I think I should install JDK manually on my Ubuntu because the  Net Beans installer I have is not the bundled version. Have you ever face the same problem like me? Then maybe you must hear my experience here.  Ok, I'll show you how to install JDK manually step by step.


Note: This guide only for Self Extracting Installer (.bin)

Tuesday, May 3, 2011

Windows XP and Wireless Network

Today I got new experience when trying to connect to a wireless network. The story began when I'm using Windows XP on a laptop and tried to connect on an available wireless network. When connecting, I saw a pop up notification from Windows taskbar and it said that "Windows was unable to find a certificate to log you on to the network *******".


Wednesday, April 27, 2011

Get back "save tabs & quit" in Firefox 4

[Tested on Firefox 4,5,6,7] This is a short trick to bring back save tabs and quit when you close your Firefox. In Firefox 3, when you have 2 tabs or more and you want to close your Firefox, you'll see notification about saving your tabs. How to enable it in Firefox 4?

1. Open your Firefox and type about:config in Firefox address bar and of course I'll be careful, I promise!

2. Go to the filter box and type quitwarning and it'll show something like this
browser.showQuitWarning

3. Right click on this item and choose toggle. Set the value from false to true.

That's all guys. Try it now :)

Wednesday, March 30, 2011

Fix Ubuntu plymouth

If your OS is Ubuntu and you have Nvidia or ATi graphic card, usually you'll have a problem with Ubuntu plymouth. Ubuntu nice plymouth turn into an ugly plymouth after you installed your graphic card driver. Here is step by step to fix it.

Resource:

Wednesday, March 23, 2011

Up button for 7 & Vista

One thing missing when moving from Windows XP to Windows Vista or Windows 7 is the up button, right? Although back button takes up button position, I think it can't replace the main functionality of the up button. Is it possible to bring back the up button? Of course! Classic Shell will help you to do that.


Classic Explorer interface

What is Classic Shell? It is a project that can help you to customize your Windows installation, for example change your start menu into classic start menu, enable add classic explorer, etc. You can see it in http://classicshell.sourceforge.net/ . Now, we back to the question, how to get back the up button? Simply, download Classic Shell in http://classicshell.sourceforge.net/ and install it in your Windows.

Next, open your Windows Explorer and use alt button to show your menu toolbar. The, right click in your menu toolbar and choose Classic Explorer or Classic Shell and go to Classic Explorer setting. There you can customize your Windows Explorer, and check show up button below Title bar tweaks. And finish! Easy, right? Now you can use up button on your titlebar. Come on, try it yourself.

Up button on Windows Explorer


Monday, March 21, 2011

Stop frustation with Soluto

Your computer start up with snail speed? It makes you frustrated, isn't it? Ok, I've the same problem before, but no more for now? Soluto! Yes, this software can help you to manage your computer startup items. Here I'll show you how Soluto works on my lappie.

Soluto interface

Thursday, March 3, 2011

Get Ubuntu Font for Ubuntu 10.04

Ubuntu 10.04 didn't come with pre-installed Ubuntu font, and you want it, how to install it? I've search in Google and I foind it. Thanks to webupd8 for make a ppa to download and to receive it's updates.

Easy, just copy and paste following lines in your terminal:
sudo add-apt-repository ppa:webupd8team/ubuntu-font-family
sudo apt-get update
sudo apt-get install ttf-ubuntu-font-family

It will add webupd8 repository for Ubuntu font family and install directly from there. And that's all guys. :D

Enable Two-Finger-Scrolling on Ubuntu 10.04

Last time I share an article about how to enable two finger scrolling on Ubuntu 10.10 . And today I tried to enable two finger scrolling on Ubuntu 10.04. It's a little different from Ubuntu 10.10. If you followed how to enable two finger scrolling on Ubuntu 10.10 in previous article, you'll found problem at number 6 (no directory xorg.conf.d). Nah, here is another trick to enable it on Ubuntu 10.04 :)

One thing you must know, this guide only works with those who have Synaptics Touchpad on their laptop. It's still the same, download Pointing Devices from Ubuntu Software Center and disable vertical and horizontal scrolling from there. And now open your text editor (gedit, kate, etc.) and copy paste this code:

synclient HorizTwoFingerScroll=1
synclient VertTwoFingerScroll=1
synclient EmulateTwoFingerMinZ=40
synclient EmulateTwoFingerMinW=8

And save it for example in your home directory. For example I save it as 2fsr in my home directory.

Next, open terminal and navigate to your home directory and give an access to your recently created file (in my case, it is 2fsr file). In my case, I type this in terminal:
sudo chmod +x 2fsr

Next, try to execute the file with this code:
./2fsr

And now try your touchpad, it should work now :) And now let's put it in startup application. Navigate to System>Preferences>Startup Applications and add a new item there and browse your recently created file (in my case, it is 2fsr) and add it. Done! Now you can use two finger scrolling every time you boot into Ubuntu 10.04. Hope this helps :)

Wednesday, March 2, 2011

Configure Thunderbird and Live@Edu email

I began to set up everything when I arrived in Linux Mint. Some interface changed and some application changed too. Because I'm a student of Ma Chung University, and I have an student email (Live@Edu) so I think I must configure an email client to help me maintain my student email. I found Thunderbird inside Linux Mint, and how to set my student email on it?

The procedure is very-very easy, because every email client will help you to do that. All you need to know is configuration setting for POP or IMAP for incoming messages and SMTP for outgoing messages, especially for student email. Let's solve this configuration now. For incoming server configuration, you can choose POP or IMAP, but IMAP is the suggested option.

Sunday, February 27, 2011

Try Ubuntu in Windows easily!

Do you want to try Linux Ubuntu in your computer? But you don't know how to install it. Affraid making mistakes? Now, you can install it inside your Windows easily. How? You can use WUBI. WUBI is an executable program which will help you to set up Linux Ubuntu inside your computer.

Saturday, February 19, 2011

Control your Ubuntu using Ubuntu Control Center

[Tested on Ubuntu 10.04 and 10.10] Do you want something easier to manage Ubuntu? Yup, you can add a Control Center where it'll help you to do some task like Software Management, Hardware, Network and Internet, System, Local Disk and Account preferences. So how to install it?


Add XAMPP Control Panel in Ubuntu

[Tested in Ubuntu 10.10] Last time, I've installed XAMPP for linux in Ubuntu and I found that it's not too different from XAMPP for Windows. Yup, I think XAMPP for Windows is more easy to use because you can find XAMPP Control Panel there. With XAMPP Control Panel, you can start Apache, MySQL etc more easy, but how about XAMPP for Linux? Use terminal to start it? Yes, but there is another way! You can use a control panel too after you installed XAMPP for Linux. Here is the instruction, we will use phyton script :)

Enable FlashPlayer for Firefox in Ubuntu

[Tested in Ubuntu 10.10 installed with Firefox 3] Yesterday I installed Ubuntu 10.10 (again) in my laptop and the first problem I found: How to enable FlashPlayer 10 in my Firefox browser? I've followed instruction to install it from add-on manager from Firefox, but sometimes unsuccess. Yeah, you can use another browser for example Google Chrome which come with FlashPlugin. But if you still want to use Firefox browser; nah, this is the easiest way to do it. Follow my instruction :)

Wednesday, February 16, 2011

Add a dock to your Windows!

[Tested on Windows Vista] Nah, everybody know that Mac OS has an application launcher (dock) and I found that it help us to lauch everthing more quickly. Yup, you can add an application laucher too into your Windows if you want. There are so many application laucher there but I'll share only two of them because I ever use it on my computer. Here it is, Rocket Dock and Object dock.

Saturday, January 15, 2011

Manage your passwords with KeePass or KeePassX

[KeePass was tested in Windows Vista and KeePassX was tested in Ubuntu 10.10] Do you have a problem with remembering your password? For example, you have a lot of username and password (Facebook, Twitter, MySpace, etc) but you're having trouble remembering all of them. Nah, I think this application can help you to manage your passwords. You don't need to remember all of your account information now. You just need to remember 1 password, and this application will help you to remember all of your account information. KeePass and KeePassX can help you now!

Wednesday, January 12, 2011

Control CPU frequency using CPU Frequency Applet

Do you know that you can manage your CPU in Ubuntu, like how fast they run and how much they consume your laptop battery? If you don't know, now you must watch this post and enable it. Why? Of course to control your CPU so they won't consume a lot of energy, so you can have more time if you're using your laptop if it's unplugged.


Monday, January 10, 2011

Show Tagline and Restore Accidentally Edited Footer in Wordpress Theme

Ok, today wanna be a geek has a new look! I've spend a lot of my time to edit this new look, and face a lot of problem when editing. The first problem is, I want to enable tagline in this new look, because when I use default template from Wordpress (twenty-ten), when I load the homepage, the site's tagline was shown. But after change to this new look, the result is -> no tagline! Ok, some templates don't show your site's tagline, but we can edit a little about your template so it can show your site's tagline in your browser!

Tuesday, January 4, 2011

Enable Two-Finger Scrolling on Ubuntu 10.10

[Tested on Ubuntu 10.10, 11.04, 11.10 and Linux Mint 10] Have Ubuntu running on your laptop, and you want to enable Two-Finger scrolling on your touch-pad, is it possible? If you go under System>Preferences>Mouse and go to the touch-pad tab, you'll see radio button to enable Two-Finger scrolling, but it's color is gray and it is not click-able, right? So how to enable it? I really want something like MacBook touch-pad! Ok guys, be patient. I've search it on Google and I found a way to enable it. O yeah, once more: this guide only enable Two-Finger scrolling (horizontal and vertical scrolling) and this only works with Synaptics touch-pad. Ok, let's begin now!

(image from: http://www.synaptics.com/sites/default/files/2F-Scroll.jpg)

Sunday, January 2, 2011

Rainmeter, customizable resource meter for Windows

Rainmeter (circuitous)
Last time, I told you about Conky - a free light weight system monitor for X. Now, I'll share you about Rainmeter. (http://rainmeter.net/RainCMS/) Rainmeter is a customizable resource meter for your Windows desktop. It's very easy to use it and you can found and download so many skin for it. The picture in the left is a screenshot of Rainmeter on my desktop with circuitous skin.

If you're looking for something like Conky Colors - cairo theme for your Windows desktop; yeah, this is it, Rainmeter - circuitous theme. Grab circuitous theme here:
http://customize.org/rainmeter/skins/70834

There are eight skins for circuitous theme: time/date, CPU, memory, power, hard drive 1, hard drive 2, network traffic, network status (WiFi). But there are some addition for circuitous theme, it is circuitous for Winamp 4 and weather circuitous. For Winamp 4 circuitous, grab it here:
http://adytzu2005.deviantart.com/art/Rainmeter-Winamp-4-Circuitous-176855352

And for weather circuitous, grab it here:
http://customize.org/rainmeter/skins/75976

Or, if you want to search another theme, you can go to http://www.deviantart.com/ or http://customize.org/. There you'll find so many themes for Rainmeter. Happy customizing your own Windows desktop! :D

Saturday, January 1, 2011

Battery Bar, a battery meter for Windows

This time, I'll introduce you this nice application from Osiris Development, Battery Bar. Battery Bar is a nice battery meter which remains in your taskbar. I'm using it and I'll share my experience about it.

There are 2 edition of  Battery Bar, Battery Bar Free edition and Battery Bar Pro Edition. I'm using Battery Bar Free Edition, but if you want something more than the free edition,(theme customization, alert and critical battery warning, etc.), you can buy the pro edition.

Merry Christmas & Happy New Year 2011

Back here, I as the admin of Wanna be a Geek want to say Merry Christmas & Happy New Year 2011. Yeah, this is the first year of Wanna be a Geek. This year, Wanna be a Geek was born. Hope this site can give you a great articles :)

God bless you all!

Conky, a free light-weight system monitor for X!


In Windows, there is an application called Rainmeter (http://rainmeter.net/) which can display system monitor on the desktop. I want something like it on my Ubuntu desktop. Is there a way to bring it to my desktop? YES! Conky can do it!

So what is conky? Conky is a free light system monitor for X which can display any info about on your deskop. Here is an example of Conky on my Ubuntu desktop.

There are two ways to configure Conky. First, you can use ConkyWizard with GUI configuration or you can use Conky-colors to make your Conky more beautiful. I use Conky-color with cairo theme. So whick one is better? Haha, it's up to you. If you ask me why I choose Conky-colors, maybe because I'm like it's cairo theme.

So, are you ready to configure Conky? Let's go!


(1)If you want to configure Conky with ConkyWizard, check this link:
(2)But if you want Conky-colors: check this link:
http://www.webupd8.org/2010/07/conky-colors-makes-your-conky-beautiful.html

And if you want Conky-colors with cairo theme, check this link:
http://www.webupd8.org/2010/08/conky-colors-gets-beautiful-new-cairo.html

Preview of my desktop using Conky

Conky make your desktop beautiful, isn't it?
And if you want the same wallpaper that i use, check this link:
http://petrsimcik.deviantart.com/#/d33br69

Plus, I use DockBarX for my bottom panel. If you want DockBarX, check this link too:
http://www.webupd8.org/2010/12/dockbarx-041-released-with-redesigned.html

So, do you like it? Hope this helps and happy customizing. :)

Configure NotifyOSD and panel gap in Ubuntu 10.04 and Ubuntu 10.10

Hi everybody, do you have a problem with notification bubble (Notify OSD) in Ubuntu 10? There is a gap between notification bubble and top panel, right? Oh, it's very annoying for me! So how to fix it? Here, I found a way to fix it after searching on Google.

NotifyOSD (before)

I search it on Google, finally I found how to fix it. All we need is Notify OSD Configuration GUI. Here is the screenshot.

NotifyOSD Configuration Interface

I've test it on Ubuntu 10.10. With this graphical user interface, we can set the vertical gap and horizontal gap of notification bubble. Here is the screenshot after I configure it on my laptop.

NotifyOSD (after)

So, how to get Notify OSD GUI? Just go to below link from WebUpd8.
http://www.webupd8.org/2010/10/tweak-notifyosd-notifications-in-ubuntu.html

Hope this helps! :D Happy customizing!

Install Microsoft Office 2007 on Ubuntu (PlayOnLinux)

Yeah, this time i'll tell you about how to install Microsoft Office 2007 on Ubuntu. It's easy! PlayOnLinux can help you to do it easily! How...?

PlayOnLinux interface

The easiest way is using PlayOnLinux (link in the end of this post). Just download and install it. After install it, run PlayOnLinux (Application&gt;Games&gt;PlayOnLinux) and click button install. Next step is, navigate to office and choose Microsoft Office 2007. Before installing, it's better for you to have an internet connection when installing Microsoft Office 2007 using PlayOnLinux, so it can get everything needed to install Microsoft Office 2007.